

Swiss Meringue Buttercream: The Silky, Not-Too-Sweet Frosting Every Home Baker Should Learn
If you’ve ever taken a bite of a bakery-style cake and wondered why the frosting tasted so much lighter and less sugary than the buttercream you make at home, there’s a good chance you were eating Swiss meringue buttercream. Unlike the classic American buttercream made by simply beating butter with powdered sugar, Swiss meringue buttercream starts with a cooked egg white and sugar base, which gets whipped into a glossy meringue before butter is added. The result is a frosting that’s smooth, stable, and far less sweet — closer to whipped silk than a sugar bomb.
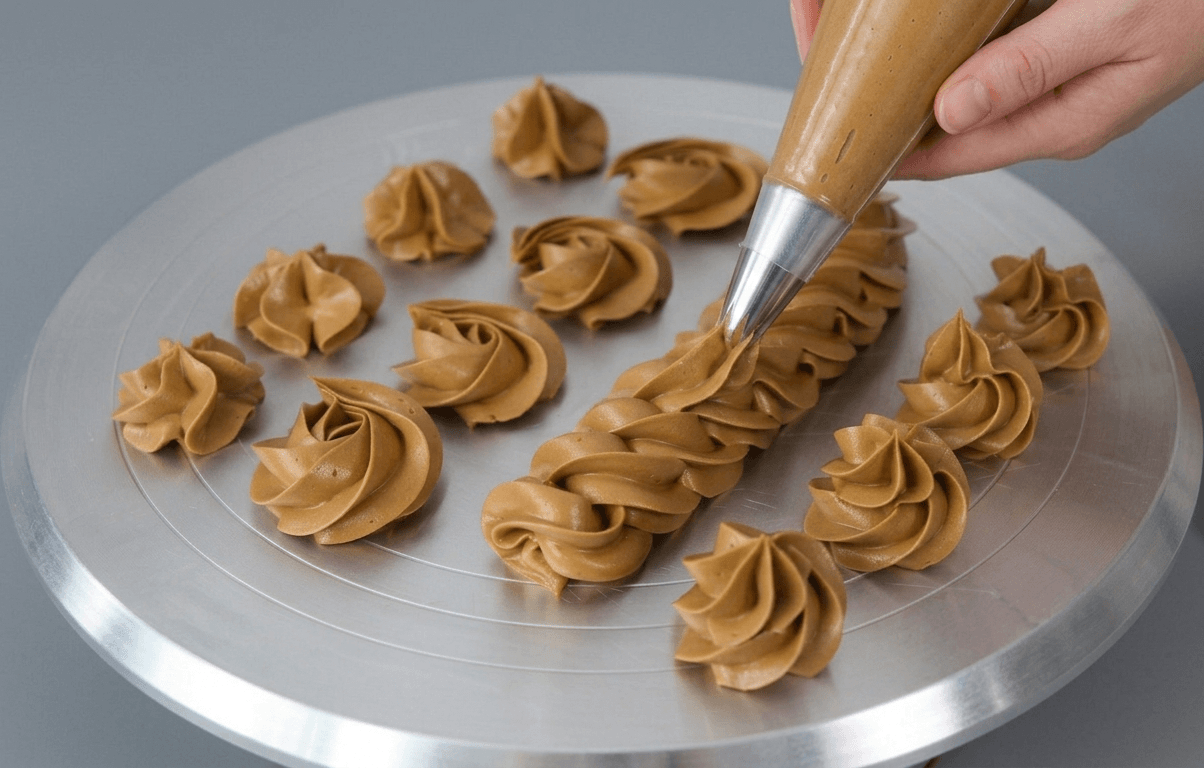
It has a reputation for being intimidating, mostly because of a few nerve-wracking minutes in the middle of the process when the mixture looks like it’s falling apart. But once you understand what’s actually happening at each stage, it becomes one of the most reliable frostings you can make, and one that pipes beautifully for layer cakes, cupcakes, and everything in between. This guide walks through both a classic vanilla version and a rich chocolate variation, along with the troubleshooting tips that make the difference between a curdled mess and a frosting worthy of a bakery display case.
What Makes Swiss Meringue Buttercream Different
Most homemade frostings fall into one of two camps: American buttercream, which is butter and powdered sugar beaten together (quick, sweet, sometimes a little gritty), or a cooked, egg-based buttercream like this one, where sugar is dissolved into egg whites over heat before butter is incorporated.
That cooking step matters for two reasons. First, it dissolves every grain of sugar, so there’s no grittiness just a smooth, almost mousse-like texture. Second, heating the egg whites to a safe temperature means you get all the stability and structure of a meringue without any raw egg concerns. The result holds its shape well enough for intricate piping, but tastes far less cloying than a powdered-sugar frosting, which makes it a favorite for anyone who finds traditional buttercream overwhelming.
What You’ll Need
For the base meringue buttercream:
- 4 large egg whites, at room temperature
- 1 cup (200g) granulated or caster sugar
- 1½ cups (340g) unsalted butter, softened but still cool to the touch
- 1 teaspoon pure vanilla extract
- A pinch of salt (optional, but it rounds out the sweetness nicely)
For the chocolate version:
- 6 to 8 ounces (170–225g) good-quality chocolate, melted and cooled slightly (dark, milk, or white — whichever you prefer)
A note on sugar: caster sugar (sometimes labeled superfine sugar) dissolves faster than standard granulated sugar because the grains are smaller, which shaves a few minutes off the cooking stage. Regular granulated sugar works perfectly well too — it just needs a little more patience and stirring.
Step 1: Separate the Eggs Carefully
Start by separating your egg whites from the yolks, working with one egg at a time over a small separate bowl before adding each white to your main mixing bowl. This one-at-a-time approach is worth the extra minute: if a stray bit of yolk breaks into your batch of whites, the fat from the yolk can prevent the whites from whipping up properly later, and you’d have to start over with fresh eggs.
Make sure your mixing bowl and whisk are completely free of any grease or residue, too. Even a trace of oil can interfere with the whites reaching full volume.
Step 2: Create a Double Boiler and Dissolve the Sugar
Fill a saucepan with an inch or two of water and bring it to a gentle simmer, then set a heatproof bowl on top, making sure the bottom of the bowl doesn’t actually touch the water. This indirect heat setup — often called a double boiler or bain-marie — warms the egg whites gently and evenly, without scrambling them.
Add your egg whites and sugar to the bowl and whisk continuously. You’re not trying to whip up volume at this stage; you’re simply melting the sugar into the egg whites while keeping everything moving so it heats evenly. Keep whisking until the mixture feels completely smooth when you rub a small amount between clean fingers — no gritty sugar granules left. If you have a candy or instant-read thermometer, you’re aiming for around 160°F (71°C), which is hot enough to dissolve the sugar fully and pasteurize the egg whites, while still cool enough to whip up nicely afterward.
Step 3: Whip Into a Glossy Meringue
Transfer the warm sugar-and-egg-white mixture to a stand mixer fitted with the whisk attachment (a hand mixer works too, though your arm will get a workout over the next several minutes). Whip on high speed for roughly 10 to 15 minutes.
In the first few minutes, the mixture will look foamy and loose. Keep going — you’re looking for stiff, glossy peaks that hold their shape firmly when you lift the whisk, rather than peaks that flop over. The bowl should also feel cool to the touch by the time it’s ready; if it’s still warm, the butter will melt too quickly in the next step, so pop the bowl in the fridge for 10 to 15 minutes to bring the temperature down before moving on.
Step 4: Add the Butter Gradually
This is the stage that trips up a lot of first-timers, mostly because of how the mixture behaves along the way — but it’s completely normal, so don’t panic partway through.
Switch your mixer to medium-high speed and add the softened butter a couple of tablespoons at a time, letting each addition incorporate before adding more. Your butter should be soft enough to leave a slight indent when pressed, but still cool enough to hold its shape — if it’s too warm, it’ll thin out the meringue instead of building structure.
As the butter goes in, the mixture will deflate somewhat and can even start to look curdled or soupy, almost like it has separated. This is simply the meringue and butter finding their balance, not a sign that anything has gone wrong. Keep the mixer running, and after all the butter is incorporated, continue mixing for several more minutes. The frosting will transform from a curdled-looking mixture into a smooth, silky, spreadable buttercream right before your eyes.
Once it comes together, mix in the vanilla extract (and the pinch of salt, if using) until fully combined.
Step 5: Smooth Out Air Bubbles
Even once your buttercream looks glossy and smooth, it will likely still hold a fair number of tiny air bubbles, which you can usually see if you drag a spatula through it. For the smoothest possible finish — especially important if you’re doing detailed piping work — swap the whisk attachment for the paddle attachment and mix on the lowest speed for 5 to 10 minutes. This slower mixing knocks out the trapped air without deflating the frosting, leaving you with a dense, ultra-smooth texture.
Making the Chocolate Version
To turn this into chocolate Swiss meringue buttercream, melt your chocolate of choice — dark, milk, or white, depending on how rich you want the final flavor — in short 20-second bursts in the microwave, stirring between each burst until fully melted and smooth. Let it cool slightly so it’s not piping hot, then pour it into the finished vanilla buttercream and mix on low speed until fully combined.
Because the melted chocolate is warmer than the buttercream, the mixture will loosen and soften noticeably as soon as it’s added. That’s expected — simply chill the bowl in the refrigerator for 20 to 30 minutes to firm it back up, then give it one more quick mix to restore that silky consistency before using it to frost or pipe.
Troubleshooting Common Problems
My buttercream looks curdled and isn’t smoothing out. This is almost always a temperature issue. If your butter was too cold when added, warm the bowl very gently (a few seconds with a kitchen torch around the outside, or a brief dunk of the mixer bowl’s base in warm water) while continuing to mix. If the butter was too warm, chill the bowl briefly and then keep whipping — patience usually resolves this within a few extra minutes.
My meringue won’t reach stiff peaks. This usually points to a trace of fat somewhere in the mix — a bit of yolk, a greasy bowl, or a whisk that wasn’t fully clean. Unfortunately, there’s no fixing this mid-process; it’s best to start the meringue over with a spotless bowl and fresh whites.
My buttercream is too soft to pipe. It likely needs more time in the fridge to firm up, or the room is simply too warm. Chill it for 15 to 20 minutes, then re-whip briefly before piping.
My buttercream is too stiff. If it’s come straight from the fridge, let it sit at room temperature for a bit and re-whip on low speed until it loosens back to a spreadable consistency.
Storage Tips
Swiss meringue buttercream keeps well at room temperature for a day if your kitchen isn’t too warm, or in an airtight container in the refrigerator for up to a week. It also freezes nicely for up to three months.
To use chilled or frozen buttercream, let it come fully to room temperature, then re-whip it in your stand mixer for several minutes. It will look broken and grainy at first — this is normal — but continued mixing brings it right back to its original smooth, silky texture.
Frequently Asked Questions
Why is Swiss meringue buttercream less sweet than other frostings? Because it’s built on whipped egg whites and butter rather than powdered sugar, there’s simply less sugar in the overall recipe, which is why it tastes lighter and less cloying than American-style buttercream.
Is it safe to eat, given the raw egg whites? The egg whites are heated over a double boiler to around 160°F (71°C), which is within the range considered sufficient to pasteurize eggs, making this safer to eat than truly raw egg whites.
Can I make it ahead of a cake decorating day? Yes — it stores well in the fridge or freezer, as noted above. Many bakers actually prefer making it a day or two in advance, since a quick re-whip after bringing it to room temperature gives an especially smooth finish.
Why did my frosting separate when I added the chocolate? If the melted chocolate was still very hot when added, it can shock the butter in the frosting and cause temporary separation. Let the chocolate cool to just slightly warm (not hot to the touch) before mixing it in, and if it does separate, a short chill followed by more mixing typically brings it back together.
Can I flavor this buttercream in other ways? Absolutely. Once you’ve mastered the base recipe, it’s easy to swap in other extracts, citrus zest, coffee, or fruit purees in place of or alongside the vanilla, as long as you avoid adding too much liquid, which can destabilize the texture.
Final Thoughts
Swiss meringue buttercream has a bit of a reputation for being a fussier frosting, but really, it just asks for a little trust during that curdled-looking middle stage. Once you’ve made it a time or two and seen firsthand how it transforms from a soupy mess into something silky and smooth, it stops feeling like a gamble and starts feeling like your go-to frosting for special-occasion cakes. Whether you keep it classic with vanilla or turn it into a decadent chocolate version, it’s the kind of frosting that makes people ask what your secret is — and now you know.
