

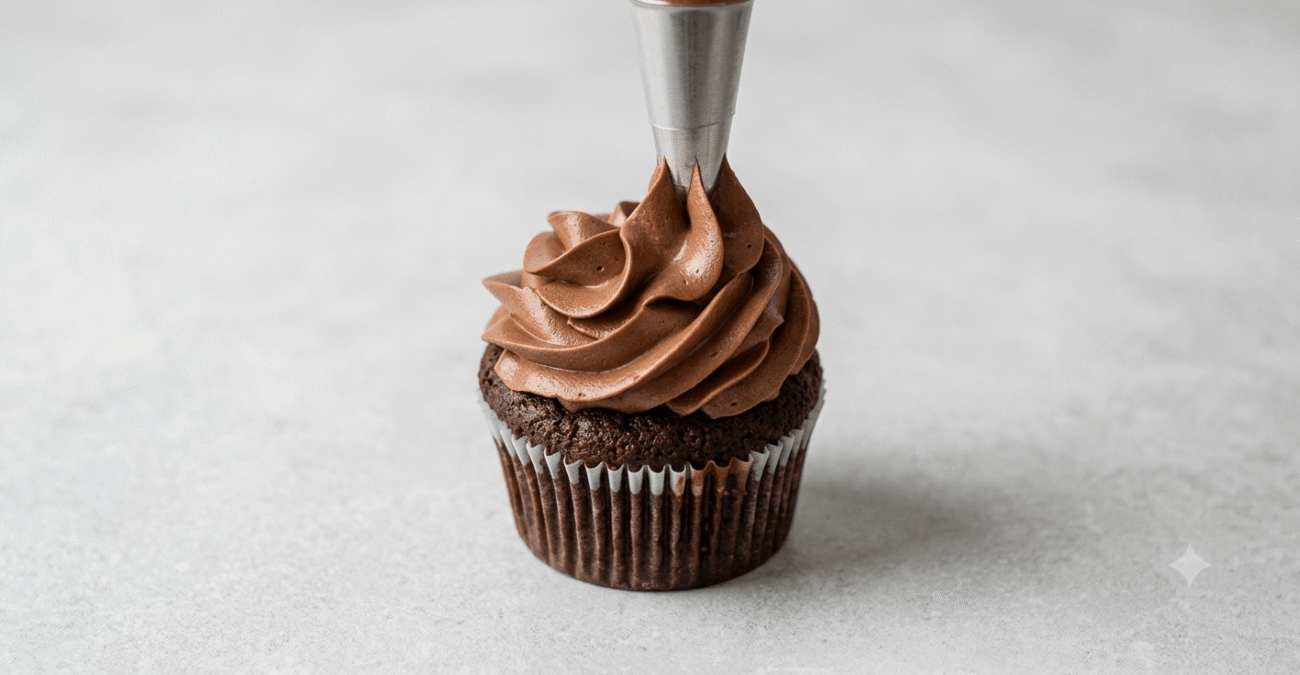
Rich & Decadent Chocolate Cupcakes with Chocolate Swiss Meringue Buttercream (Easy Recipe)
If you’re looking for a chocolate cupcake recipe that’s soft, moist, and full of rich chocolate flavor, you’ve found it. These cupcakes are easy to make and turn out delicious every time. They bake with soft centers and light, cracked tops that show they’re made with real chocolate.
The batter comes together with simple pantry ingredients, and you don’t need a stand mixer. Top each cupcake with smooth Chocolate Swiss Meringue Buttercream for a homemade treat that looks and tastes like it came from a bakery.
This recipe makes 12 cupcakes, making it perfect for birthdays, family gatherings, bake sales, or weekend baking. It’s also great when you’re craving something sweet and chocolatey.
You’ll find everything you need below. Follow the easy step-by-step instructions, learn helpful baking tips, and get simple storage advice. I’ve also answered common questions to help you bake perfect chocolate cupcakes every time.
Why This Chocolate Cupcake Recipe Works So Well
There are a few small techniques in this recipe that make a big difference in the final texture:
- Oil instead of butter in the batter keeps the crumb soft even after refrigeration, since oil stays liquid at cold temperatures while butter solidifies and stiffens the cake.
- Melted dark chocolate combined with cocoa powder gives the cupcakes a deeper, more complex chocolate flavor than cocoa powder alone.
- Hot water blooms the cocoa and helps dissolve the sugar and instant coffee fully, which results in a smoother batter and a more tender crumb.
- Instant coffee powder does not make the cupcakes taste like coffee. Instead, it intensifies the chocolate flavor, a classic baker’s trick.
- A short, deliberate whisking time activates just enough gluten to give the cupcakes structure without making them dense or chewy.
The result is a batter that looks thin and runny going into the oven, but bakes into a rich, tender cupcake with a shiny, slightly cracked top once it has had time to cool.
Ingredients You Will Need
For the Chocolate Cupcakes (makes 12)
- 2/3 cup all-purpose flour
- 2/3 cup white granulated sugar
- 3 tablespoons cocoa powder
- 1/2 teaspoon baking soda
- 1/4 teaspoon salt
- 1/2 cup dark chocolate (or dark chocolate chips)
- 1/3 cup unflavored vegetable oil
- 1/4 cup plain yogurt or sour cream
- 2 large eggs
- 2 teaspoons vanilla extract or essence
- 1 teaspoon instant coffee powder
- 1/3 cup hot water
For the Chocolate Swiss Meringue Buttercream
- 4 egg whites
- 1 1/2 cups caster sugar (or regular white granulated sugar)
- 400 grams unsalted butter, at room temperature
- 1 teaspoon vanilla extract
- 225 grams dark chocolate, melted
How to Make the Chocolate Cupcakes
Step 1: Combine the Dry Ingredients
In a mixing bowl, add the flour, sugar, cocoa powder, baking soda, and salt. Whisk everything together until well combined, then set the bowl aside.
Step 2: Melt the Chocolate and Oil
In a small, separate bowl, combine the dark chocolate (or chocolate chips) with the vegetable oil. Microwave the mixture for about a minute, or until the chocolate has fully melted, then stir well until you have a smooth, silky, liquid mixture.
Step 3: Add the Wet Ingredients
To the melted chocolate mixture, add the yogurt or sour cream, eggs, vanilla extract, and instant coffee powder. Whisk everything together until it forms a thick, well-combined mixture.
Step 4: Add the Hot Water
Pour in the hot water and mix well until it is fully incorporated into the wet mixture.
Step 5: Combine Wet and Dry
Add the liquid mixture into your bowl of dry ingredients. Whisk everything together for about 45 seconds. This step matters more than it seems: whisking for this amount of time activates just enough gluten to give the cupcakes proper structure, but overmixing beyond this point will leave you with a gooey, dense texture instead of a light one. Mix just until combined and no longer.
Step 6: Fill the Cupcake Cases
Line a 12-cup cupcake tray with paper cases. The batter will be quite thin and runny, which is completely normal and exactly how it should look at this stage. Using a large spoon or an ice cream scoop, fill each cupcake case about two-thirds of the way up. Do not overfill them, or the batter will rise too high during baking and overflow the cases. This recipe is calibrated to make exactly 12 cupcakes when portioned this way.
Once filled, give the tray a gentle bang on the counter to release any large air bubbles trapped in the batter.
Step 7: Bake
Bake the cupcakes at 155°C (about 310°F) for 18 to 20 minutes, or until a toothpick inserted into the center comes out clean. Baking at this slightly lower temperature helps the cupcakes rise evenly without doming too aggressively, while still developing that lovely cracked top.
Step 8: Cool Completely
Once out of the oven, let the cupcakes cool in the tray for about 30 minutes before transferring them to a wire rack to cool completely. You will notice a signature crack across the top of each cupcake, which comes from the real melted chocolate in the batter. If you let the cupcakes sit for several hours, or even overnight, the tops will develop a beautiful glossy sheen, and the crumb becomes even more moist. Patience really does pay off with this recipe.
How to Make Chocolate Swiss Meringue Buttercream
Swiss meringue buttercream has a reputation for being intimidating, but once you understand the process, it is very manageable. It is less sweet than traditional American buttercream and has an incredibly silky, smooth texture that pipes beautifully.
Step 1: Separate the Eggs
Separate the egg whites from the yolks. Using clean hands is often the easiest way to do this, but a proper egg separator works just as well.
Step 2: Set Up a Double Boiler
Fill a small saucepan with a little water and bring it to a gentle simmer. Place a heatproof bowl on top, making sure the bottom of the bowl does not touch the water directly. Add the caster sugar and egg whites to the bowl and whisk them together.
Step 3: Heat the Egg White Mixture
Continue gently whisking the mixture as it heats over the simmering water. You are looking for the mixture to reach 75°C. If you do not have a kitchen thermometer, you can test this by rubbing a small amount of the mixture between your fingers; if you cannot feel any sugar granules, it is ready.
Step 4: Whip to Stiff Peaks
Transfer the warm sugar and egg white mixture to the bowl of a stand mixer fitted with the whisk attachment. Whip on high speed until the meringue reaches stiff, glossy peaks and the bowl has cooled down to room temperature. This usually takes 10 to 15 minutes.
A quick but important note: make sure your mixing bowl and whisk are completely free of any grease or fat residue before you start. Even a small trace of fat will prevent the meringue from whipping up properly, so wash your equipment thoroughly beforehand. It also helps to check on the meringue about halfway through whipping to make sure it is developing evenly. You will know it has reached stiff peaks when the peaks hold their shape and stand upright rather than drooping over, and the meringue looks smooth and shiny.
Step 5: Add the Butter
Your butter needs to be at the right temperature for this step: firm enough to hold its shape, but soft enough that you can leave a gentle indent in it with your finger. With the mixer running on medium speed, add the butter in small portions at a time. Adding too much butter at once can deflate the meringue, so take your time here.
Step 6: Add Flavoring and Mix Until Smooth
Once all the butter has been incorporated, mix in the vanilla extract and continue mixing on medium speed. At this stage, it is completely normal for the buttercream to look curdled or separated. Keep mixing and it will come together into a smooth, silky consistency.
For an extra smooth finish, switch from the whisk attachment to the paddle attachment and mix on low speed for about 10 minutes, or until the buttercream is glossy and smooth enough that a spatula glides through it easily.
Step 7: Add the Melted Chocolate
Melt the dark chocolate in the microwave in 20-second bursts, stirring between each burst, until fully melted and smooth. Add the melted chocolate to the vanilla Swiss meringue buttercream and mix on low speed, pausing about halfway through to make sure everything is evenly incorporated. Once combined, you will be left with a rich, glossy chocolate Swiss meringue buttercream that is ready to pipe.
Piping the Cupcakes
Fit a piping bag with a large star tip, such as a 1M tip, and fill it with the chocolate buttercream. From here, you have several options depending on the look you want:
- Classic rosette: Pipe in a tight, continuous spiral starting from the outer edge and working inward.
- Traditional swirl: Pipe in a smooth, single upward spiral for a clean, classic cupcake look.
- Ruffled swirl: Pipe the same swirl motion but slower and with slightly more pressure, which creates a softer, ruffled texture.
- Ruffle top: Apply gentle pressure while moving the piping bag quickly up and down to create a decorative ruffled finish.
Any of these techniques will give you a beautiful, professional-looking cupcake, so feel free to experiment and find your favorite.
Tips for Success
- Do not overmix the batter. Whisking beyond the recommended 45 seconds develops too much gluten and results in dense, gooey cupcakes instead of soft, tender ones.
- Use a kitchen scale for the buttercream ingredients. Butter and chocolate measured in grams give far more consistent results than cup measurements.
- Make sure your mixing bowl is completely fat-free before whipping the meringue, otherwise it will not whip up to stiff peaks.
- Let the cupcakes cool fully before piping. Warm cupcakes will melt the buttercream and ruin your piping design.
- Room temperature butter is key. Butter that is too cold will create lumps in the buttercream, while butter that is too warm will make it too soft to pipe properly.
Storage Instructions
These cupcakes store beautifully, which makes them a great make-ahead option for parties and events.
- Room temperature: Unfrosted cupcakes can be kept in an airtight container at room temperature for up to 2 days.
- Refrigerator: Frosted cupcakes should be stored in an airtight container in the fridge for up to 5 days. Let them sit at room temperature for about 20 to 30 minutes before serving so the buttercream softens back up.
- Freezer: Unfrosted cupcakes freeze very well for up to 3 months. Wrap them individually in plastic wrap and store in a freezer-safe bag. The buttercream can also be frozen separately in an airtight container; thaw it in the fridge overnight, then bring it to room temperature and re-whip before using.
Frequently Asked Questions
Can I use butter instead of vegetable oil in the cupcake batter? Oil is recommended here because it keeps the crumb soft even after the cupcakes are chilled, while butter tends to firm the cake up in the fridge. If you prefer to use butter, expect a slightly denser texture.
Why is my cupcake batter so runny? This is completely normal for this recipe. The thin batter is what gives these cupcakes their signature moist, tender crumb, so do not be tempted to add extra flour to thicken it.
Can I make this recipe without a stand mixer? The cupcake batter can easily be made by hand with a whisk. The Swiss meringue buttercream, however, really does need an electric mixer, ideally a stand mixer, since whipping the meringue to stiff peaks by hand would take a very long time and a lot of effort.
Can I substitute the yogurt or sour cream? Yes, either works interchangeably in this recipe, and you could also substitute buttermilk if that is what you have on hand.
Why does the recipe include instant coffee if I do not like coffee flavor? The small amount of instant coffee powder does not add a coffee taste. Instead, it enhances and deepens the chocolate flavor, which is a common trick used in chocolate baking.
My Swiss meringue buttercream looks curdled. Did I do something wrong? No, this is a normal stage in the process. Keep mixing on medium speed and it will smooth out into a silky, glossy buttercream.
Can I use milk chocolate instead of dark chocolate? You can, though the buttercream will be noticeably sweeter and slightly softer, since milk chocolate has a higher sugar and fat content than dark chocolate.
Final Thoughts
These rich chocolate cupcakes with chocolate Swiss meringue buttercream are the kind of recipe that looks and tastes far more impressive than the effort required to make them. The cupcake batter comes together in one bowl with basic ingredients, and while the buttercream takes a bit more time and technique, the silky, not-too-sweet result is well worth it. Whether you pipe a simple swirl or go all out with a ruffled finish, these cupcakes are guaranteed to disappear fast.
If you give this recipe a try, let us know in the comments how your cupcakes turned out, and feel free to share your piping designs.
Moist Chocolate Cupcakes Recipe
Materials
- ⅔ cup 83g all-purpose flour
- ⅔ cup 133g white granulated sugar
- 3 tbsp 20g unsweetened cocoa powder
- ½ tsp baking soda
- ¼ tsp salt
- ½ cup 80g dark chocolate (semi-sweet works too), chopped or chips
- ⅓ cup 72g unflavored vegetable oil (canola or similar)
- ¼ cup 61g plain yogurt (sour cream works too)
- 2 large eggs
- 1 tsp instant coffee powder
- ⅓ cup 78g hot water
- 2 tsp vanilla extract
Instructions
- Preheat your oven to 155°C (311°F), fan/convection setting on if available (see Note 1 below if your oven doesn't have this function). Line a 12-cup cupcake tray with liners.
- In a mixing bowl, whisk together the flour, sugar, cocoa powder, baking soda, and salt until fully combined. Set aside.
- In a heatproof bowl, combine the dark chocolate and vegetable oil. Microwave in short bursts (about 1 minute total) until the chocolate is melted, then stir until smooth and glossy.
- Add the yogurt, eggs, vanilla extract, and instant coffee powder to the melted chocolate mixture. Whisk until well combined and slightly thickened.
- Pour in the hot water and mix until fully incorporated.
- Add the wet mixture to the dry ingredients and whisk for about 45 seconds, just until combined. Avoid overmixing — this keeps the crumb soft rather than dense.
- Divide the batter evenly between the cupcake liners, filling each about two-thirds full.
- Bake for 18–20 minutes, or until a toothpick inserted into the center comes out clean.
- Let the cupcakes cool completely in the tray before frosting. Chocolate Swiss meringue buttercream pairs beautifully with these.

⭐⭐⭐⭐⭐
These chocolate cupcakes turned out incredibly soft and moist! The crumb was perfect, and the chocolate flavor was rich without being too sweet. This recipe is definitely going into my favorites.